e-Manual TopContentsHelpGlossary
Category
Top » Scan and Store » Adjusting Density Manually

Category Top

Overview of This Function

Advanced Box/Network Settings

Mail Box

Advanced Box

Network

Memory Media

Flow of Scan and Store Operations

Storing Scanned Originals in a Mail Box

Storing Scanned Originals in the Advanced Box

Storing Originals on the Network

Storing Originals into Memory Media

Canceling a Job While Scanning

Storing Originals While Printing

Favorite Settings

Storing Favorite Settings

Recalling and Deleting Favorite Settings

Switching the Color Mode

Setting the Resolution

Changing the Zoom Ratio

Specifying/Registering Scan Sizes

Setting the File Format

Trace and Smooth

Compact PDF Files

Searchable PDF Files

PDF Files with a Digital Signature

Encrypting PDF Files

Applying a Policy

Storing a Reader Extensions Compatible PDF

Selecting the Original Type

Adjusting Density Manually

Adjusting Background Density

2-Sided Original

Book → 2 Pages

Booklet Scanning

N on 1

Erase Frame

Different Size Originals

Job Build

Inverting Images (Nega/Posi)

Adjusting the Image Sharpness

Combination of Functions Chart

Collapse all|Expand all
Adjusting Density Manually
When scanning, you can adjust the density to the most appropriate level for the original.
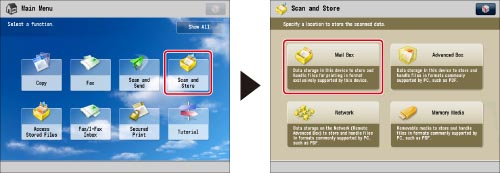
As an example, the procedure for selecting a mail box as the storage location is explained in this section.
1.
Press [Scan and Store] → [Mail Box].
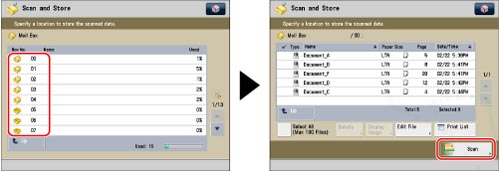
2.
Select the desired Mail Box → press [Scan].
3.
Press [Density] → press or to adjust the density for the original.
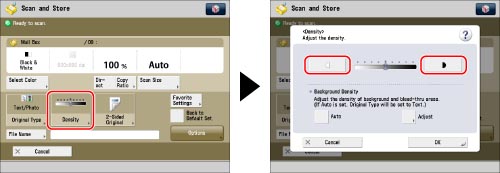
4.
Press [OK].

IMPORTANT
For information on the modes which cannot be set in combination with this mode, see "Combination of Functions Chart."