e-ManualTopSite mapHelpGlossary

Category Top

Preface

Digitizing Paper Documents

Scanning the Original and Sending to a Computer

Adding an Image Scanned via Network Scanner to a Document

Converting Scanned Documents into Encrypted Searchable PDF

Using an Advanced Box on the Network

Printer Driver

Merging and Printing Multiple Documents (Windows)

Printing a Booklet (Windows)

Printing a Booklet (Mac OS)

Using Profiles to Print (Windows)

Selecting Presets for Printing (Mac OS)

Specifying the Printer Driver Default Settings (Windows)

Fax

Temporarily Storing and Viewing Received Image

Handling Junk Faxes

Automatically Forwarding Received Faxes

Automatically Forwarding Received Faxes to a Computer

Forwarding to a Mobile Computing Device

Forwarding Received Faxes

Handling Files with Forwarding Errors

Checking That the Sent Fax Was Delivered Successfully

Accessing the Fax Function of a Server Machine

E-Mail

Sending an E-mail to Multiple Destinations

Using a Shared Address Book

Internet Fax/Intranet Fax

Sending a Document via Internet Fax

Receiving a Document via Internet Fax

Department ID Management

Setting a Department ID for Copying

Setting the Department ID Management on the Printer Driver

Mail Box

Practically Applying Print Data

Backing Up the Data Stored in the Mail Box

Security

System Management

Secured Print

Specifying Send/Fax Security Settings

Mail Box Security

Restricting Access to the Machine (IPv4)

Restricting Access to the Machine (IPv6)

Advanced Copying and Printing

Scanning Originals While the Machine Is Processing a Job (Reserve Copy)

Printing Files Stored in USB Memory Directly from the Machine

Creating Address Labels by Scanning Business Cards

Customizing the Screen Display

Making Favorite Keys Highly Visible

Registering a Series of Frequently Used Functions in One Button (Quick Menu)

Recalling the Quick Menu of Another Machine

Linkage Between imageRUNNER ADVANCE Desktop and imageRUNNER ADVANCE

Automatically Importing Received FAX Documents into Library (imageRUNNER ADVANCE Desktop)

Sending a Fax from a Computer (imageRUNNER ADVANCE Desktop)

Performing Saddle Stitch Printing (imageRUNNER ADVANCE Desktop)

Performing Complex Tasks at the Touch of a Button: Workflow Composer

Creating a Flow on a Computer (Workflow Composer)

Duplicating/Editing a Flow to Create a Personal Flow (Workflow Composer)

Executing a Flow on the Machine (Workflow Composer)

Top » Practical Workflows » Fax » Checking That the Sent Fax Was Delivered Successfully
Checking That the Sent Fax Was Delivered Successfully
0R9W-22E
You may want to check that the fax was sent successfully. In this case, it is recommended that you use the Job Done Notice mode.
Benefits from Job Done Notice
Job Done Notice
By using the Job Done Notice mode, you can be notified that the job was completed without actually checking on the touch panel display of the machine.
Stored Sent Fax
By also selecting the sender's e-mail address as the destination when sending a fax, you can store the sent fax.
Required Condition
E-mail settings are specified.
Fax settings are specified.
This section describes how to register the e-mail address, and then set so that when the fax is sent, job done notice is sent to the registered e-mail address.
The screens may differ, depending on the model of the machine and on attached optional products.
Follow the procedures below.
Registering an E-Mail Address
Job Done Notice Settings
Registering an E-Mail Address
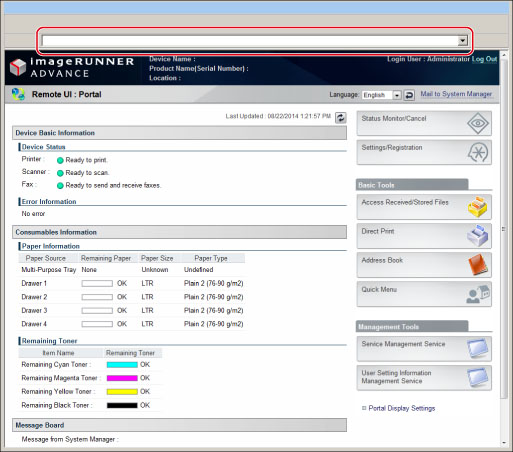
You can operate this procedure using the touch panel display or the Remote UI.
Using the Remote UI
You can register an E-mail address effectively from the Remote UI.
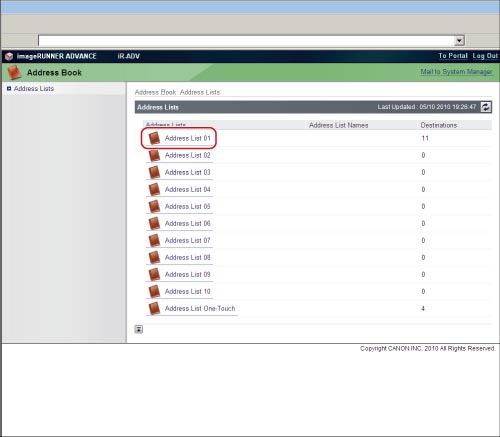
1.
Start a Web browser → enter the IP address of the machine in [Address].
http://<IP address of the machine>
The Remote UI screen appears.
2.
Click [Address Book] → [Address List 01] on the Address List screen.
3.
Click [Register New Destination] → Register New Destination screen appears.
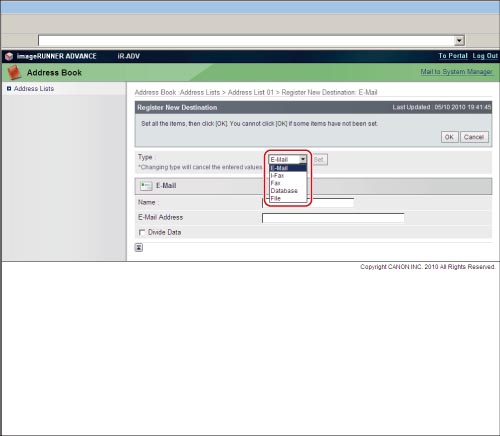
4.
Select [E-Mail] from the Type → click [Set] → enter a name and e-mail address in the [Register New Destination: E-Mail] screen.
5.
Click [OK].
The address is registered.
Using the Touch Panel Display
You can register an E-mail address from the touch panel display.
1.
Press (Settings/Registration) → [Set Destination] → [Register Destinations] → [Register New Dest.] → [E-Mail].
2.
Enter [Name] → press [Next].
3.
Enter [E-Mail Address] → press [OK].
4.
Press [OK] repeatedly until the Main Menu screen appears.
Job Done Notice Settings
1.
Place the original on the feeder or the platen glass.
2.
Press [Fax] on the Main Menu screen → [Options] → [Job Done Notice] → select the destination to send the Job Done Notice → press [OK] → [Close].
3.
Enter the recipient's fax number using  - (numeric keys).
4.
Press (Start).
When the job is completed, a Job Done Notice is sent to the e-mail address registered in steps 2 to 3.